Tips for Editing/Adjusting Photos
April 15, 2021
There are many photos that show something really important or interesting, but that have exposure problems. Here are a couple examples with hints on how to improve them. This requires the use of Photoshop Elements (or full Photoshop) – other programs like the open source GIMP, or other desktop applications could achieve the same results. Simpler apps (Microsoft Paint, phone-based apps, etc.) are less likely to produce good results.
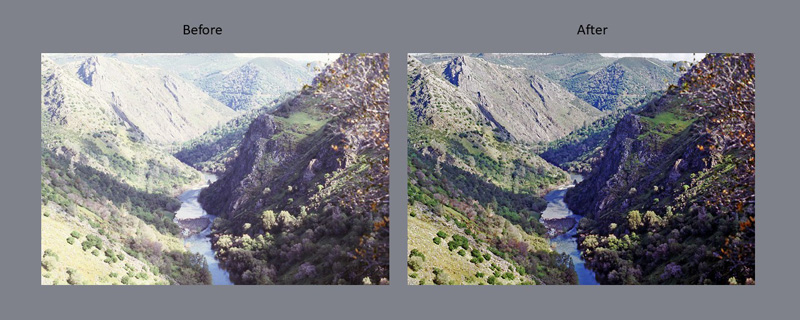
In the first example, the landscape in sunlight has been badly overexposed, but there’s still some detail there to recover. In the adjusted image, values are more evenly matched over the entire image, color is adjusted and tones are balanced.
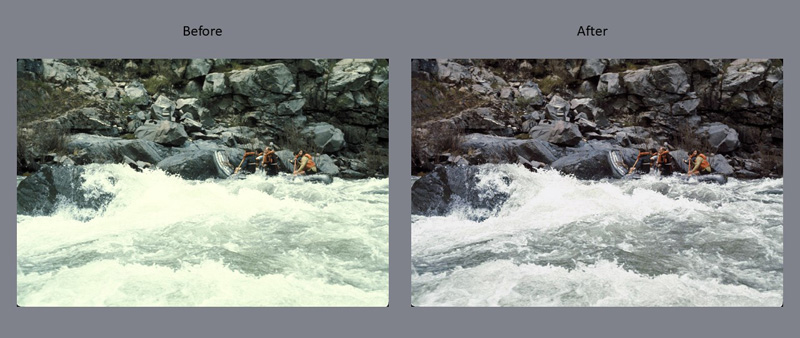
Whitewater images can also be challenging, as the whitewater is easily overexposed, often leaving nothing but a white expanse. But many such images still have some detail in them; by using a Shadows/Highlights tool (and other adjustments noted below), you can restore decent values in these areas.
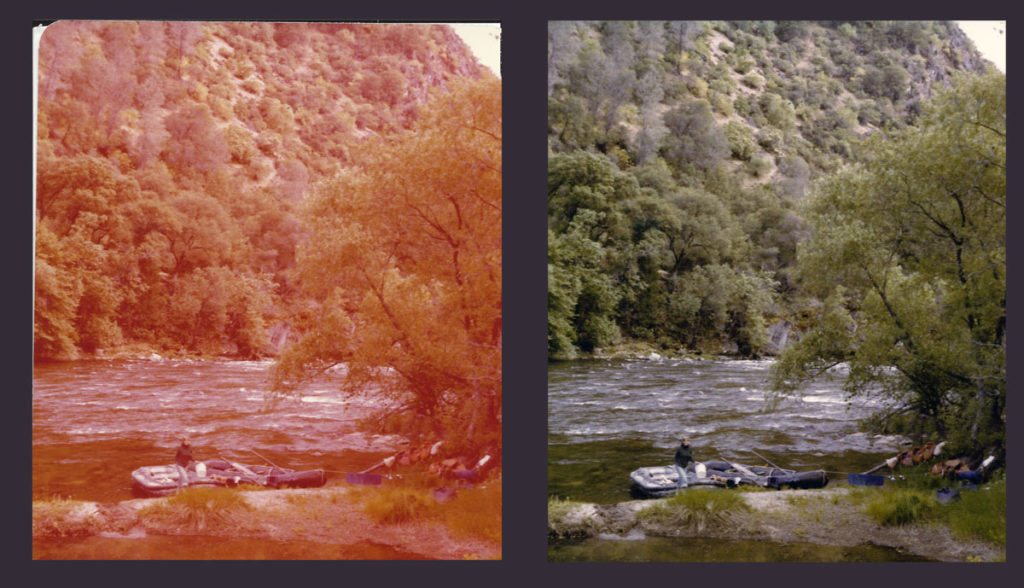
Here’s another image that has the common problem of old slides – they turn orange and seem to lose all their color (especially a problem with Agfachrome). In Photoshop Elements, the fix is easy and dramatic – simply choose “Auto Levels” and the image goes from that on the left to that on the right. You can then use the “Remove Color Cast” tool to refine it.
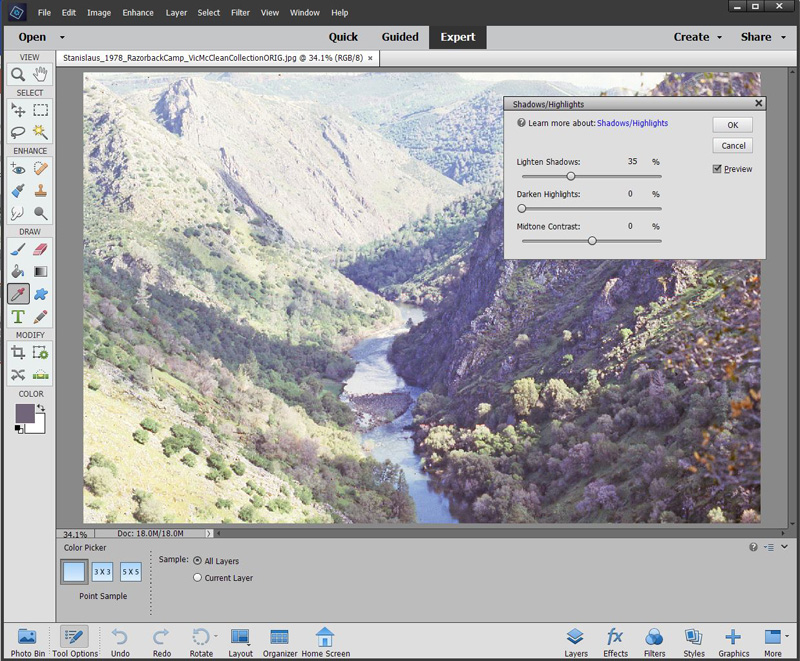
The approach used in both of these relies on these steps in Photoshop Elements Here’s an image of what the tools look like in Photoshop Elements (Pro is slightly different) and the general sequence of steps: 1) Use the Auto Levels tool to restore overall balances; 2) Apply the Auto Color Correction tool (if not satisfactory, you’ll have to use Remove Color Cast and pick key values to reset the overall color with an eyedropper tool); 3) Use the Shadows/Highlights tool to bring out the highlights (or conversely, the shadows) while possibly lowering overall contrast and playing with doing both adjustments to get an even set of tones for step 4; 4) Use the Auto Smart Tone controls to set the final overall balance – sometimes you can do this better with using the manual Levels controls, but Smart Tone is pretty good for most images. Save and you’re done.